 I’ve always been attracted to the cozy stone homes that dot the landscape along the Lake Erie shores near my home in Ontario, Canada. They appear inviting and almost magical to me. Like real life fairy houses. So when I took up the hobby of miniature gardening almost my very first thought was to make a miniature stone house of my very own. After many experiments I stumbled on a quick and easy way to get that tiny stone house look using DIY veneer. Here’s how.
What You’ll Need
- Glue
- Ziplock bag
- A form – bird house, old margarine container, gourd or other item
- Some small stones
- Tweezers
- Shellac or urethane
Optional – Laundry Bad/ Plastic berry box, artificial moss

Materials
Getting Ready
I live near a lake so I just gather handfuls (and buckets full) of beach pebbles. I’ve also used crushed stone that’s commonly used on gravel roads and driveways. This can be purchased in bags at places like Lowe’s and Home Depot. Smaller packs of stones can sometimes be found at craft and dollar stores. Any stone will work that is small and has some flat-ish surfaces.I’ve applied stone this way to gourds, wood, and even glass. This time I am experimenting with a plastic juice bottle and a plastic salad bowl.
 The plastic berry box comes in handy to sift out the tiniest of stones and some of the sand. Remove any stones that are larger than a 1/4″ and set them aside. I now have some fairly uniform sized pebbles. Next, put them in a mesh laundry bag and give them a good shaking around out doors. This gets rid of most of the sand and the rest disappears when I give the stones a rinse while still in the bag.
What to Do
First squeeze some wood glue onto the Ziploc baggie and spread it around making several small square areas up to 4 inches square. Then take some stones and arrange them on the glue. I like working with beach pebble. You can more or less just dump them on the glue, pat them down and do just a little adjusting to get them into a nice little square. The crushed stone takes a little more fussing, so just start with one or two glue squares. The tweezers come in handy for adding the tiniest of stones to fill in any spaces.
Wait about half an hour and check your squares. The glue will dry around the stones much faster than it will dry to the soft plastic.Try lifting the stone from the corner. When its ready you will be able to lift the square of stone without the stones separating. 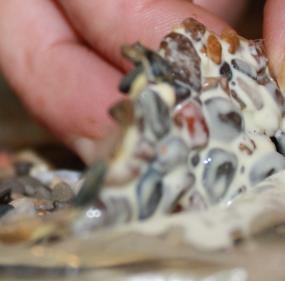 The trick is, you need to lift the square while the glue is still tacky on the under side and the square is still flexible. This allows you to apply it on rounded areas. If it dries out completely, no worries. You will still be able to lift it from the plastic and you can add some glue to the back.
Next
Now you can apply the stone to whatever form you have chosen for your project. Cut out any windows or doors you want before applying the stone. You should still be able to pull individual stones away from the veneer if your square overlaps any cut out areas. Wood glue works well for gluing stone to stone as well for making garden walls, arches and anything else you can imagine. However the finished project can be brittle, so add a couple of coats of varnish to help make it more stable and useful for outdoors.
For around doors and windows and on the roof of my project I glued stones one at a time to my form. On the roof you might see some ‘flowers’. Pebble mosaics, if you have the patience is a nice touch. Finally, after varnishing I add a pinch of artificial moss here and there to give my project an aged look.
Have a very fairy good time!


